Maintenance Guide
How to Remove Grasscloth Wallpaper
Removing grasscloth is harder than removing standard wallpaper — the natural fibers shred, the backing sticks, and aggressive scraping damages drywall. Here's the safe, step-by-step process.
Key Takeaways
- Two stages: Peel fiber face first, then soften and scrape the paper backing.
- Use gel-based stripper (like DIF) — it clings to vertical surfaces better than water.
- Score lightly — too many deep cuts damage the drywall underneath.
- Plastic scraper — metal blades gouge drywall; always use plastic.
- Patience over force — if the backing resists, re-wet and wait. Don't scrape harder.
- Turn off electricity to outlets before applying any liquid near electrical boxes.
- Budget 4–8 hours per average room (walls only, no ceiling).
What Tools Do You Need?
| Tool | Purpose | Approximate Cost |
|---|---|---|
| Scoring tool (Paper Tiger) | Create perforations for stripper penetration | $8–15 |
| Gel-based wallpaper stripper (DIF) | Dissolve adhesive behind backing | $10–15 /bottle |
| Pump sprayer | Apply stripper solution evenly | $8–12 |
| Plastic scraper (wide blade) | Lift backing without gouging drywall | $5–10 |
| Scouring sponge + bucket | Clean residual adhesive from wall surface | $5 |
| Drop cloths | Protect floors from water and adhesive drips | $10–20 |
| Wallpaper steamer (optional) | Last resort for stubborn adhesive | $30–50 rental |
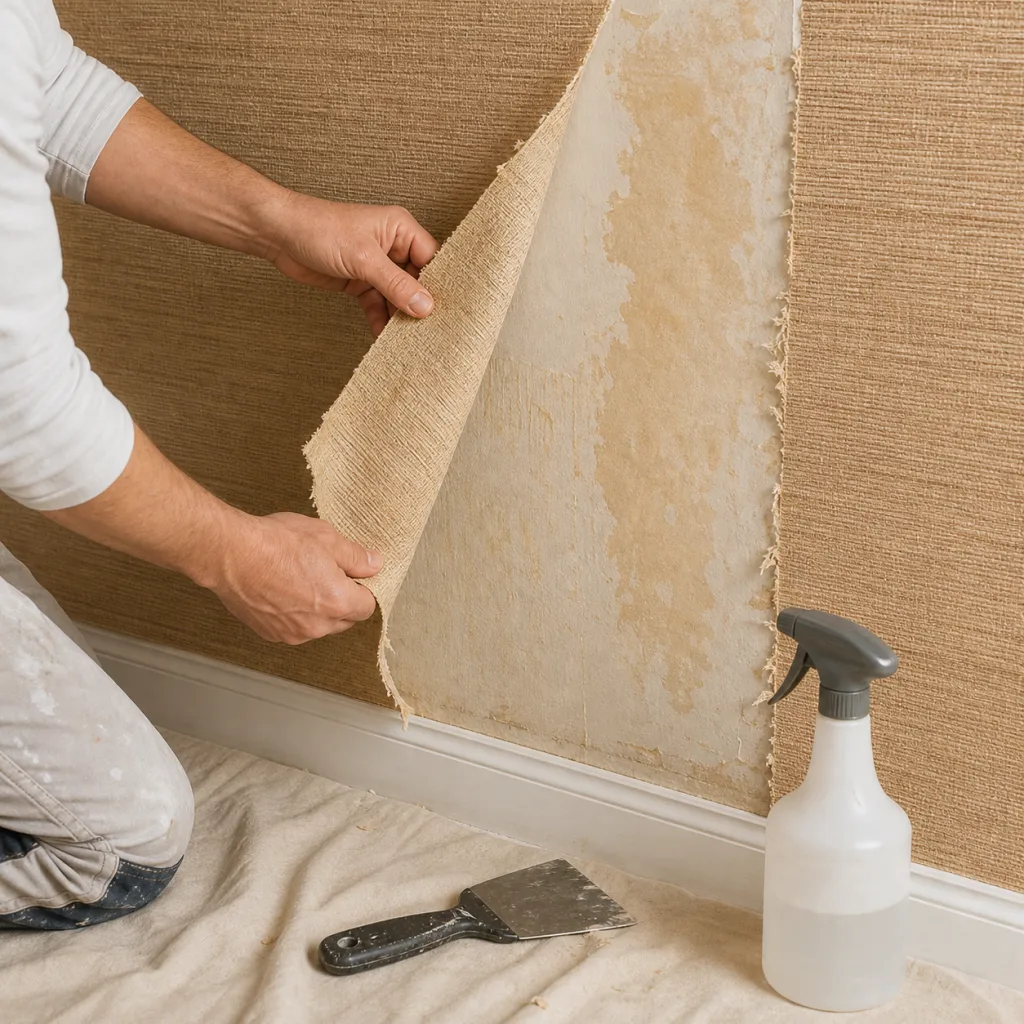
How Do You Remove Grasscloth Step by Step?
Stage 1: Remove the fiber face
- Turn off electricity to all outlets and switches on the wall you're working on
- Protect the floor with drop cloths — the process is wet and messy
- Find a seam and try to peel the fiber layer from the top corner — use a fingernail or putty knife to lift the edge
- Peel downward slowly at a 45° angle. Most grasscloth separates into a fiber face layer and a paper backing. The face should come off in large sheets.
- If the face doesn't separate, it may be bonded too tightly — skip to Stage 2 and treat the entire material at once.
Stage 2: Remove the paper backing
- Score the backing lightly with a Paper Tiger scoring tool — use gentle pressure with circular motions. You want tiny perforations, not deep cuts. Over-scoring damages the drywall face paper underneath.
- Apply gel-based stripper generously with a pump sprayer. Work in sections of about 1–2 m² at a time. Gel formula clings to the vertical surface and penetrates better than plain water.
- Wait 15–20 minutes — keep the surface damp but not dripping. Re-spray if it starts to dry. The adhesive needs time to reactivate and soften.
- Scrape with a plastic blade — hold the scraper at a very low angle (nearly flat against the wall) and slide it under the softened backing. Work upward in smooth strokes.
- If it resists, don't force it — re-wet the area, wait another 10 minutes, then try again. Forcing the scraper will tear the drywall face paper.
- Clean residual adhesive — after all backing is removed, wash the wall with warm water and a scouring sponge to remove remaining adhesive residue.
- Let the wall dry completely (24–48 hours) before priming or applying new wallcovering.
What If the Grasscloth Won't Come Off?
Some older installations used extremely strong adhesive, or the wallcovering was installed on unprimed drywall. In these cases:
- Steamer (last resort): A wallpaper steamer can penetrate heavy adhesive. Hold the steam plate against the wall for 30–60 seconds per area, then scrape immediately. ⚠️ Caution: Too much steam softens the drywall gypsum core — keep the steamer moving and never hold it in one spot for more than 60 seconds.
- Unprimed drywall: If the grasscloth was installed directly on bare (unprimed) drywall, removal will likely damage the drywall face paper. In this case, you have two options:
- Accept the wall damage and plan to skim coat afterwards
- Apply new wallcovering directly over the existing paper backing (after ensuring it's firmly bonded)
How Do You Repair the Wall After Removal?
- Inspect for damage — look for torn drywall face paper, gouges, adhesive residue and rough spots
- Seal torn drywall — apply a coat of gardz or shellac-based primer over any torn paper to prevent it from bubbling when wet
- Skim coat — apply a thin layer of joint compound to achieve a smooth, uniform surface
- Sand smooth — 150-grit, then 220-grit
- Prime — apply wallcovering primer if installing new wallcovering, or standard primer for painting
How Long Does Grasscloth Removal Take?
| Room Size | Easy Removal | Difficult Removal |
|---|---|---|
| Accent wall (5–8 m²) | 1–2 hours | 2–4 hours |
| Standard room (25–35 m²) | 4–6 hours | 8–12 hours |
| Large room (40+ m²) | 6–8 hours | 12–16 hours |
"Easy removal" = wallcovering installed over primed wall with clear adhesive. "Difficult removal" = installed over unprimed drywall or with heavy clay-based adhesive.
Frequently Asked Questions
Can I paint over grasscloth instead of removing it?
Technically yes, but it's not recommended. The natural fiber texture will show through paint, seams will remain visible, and the fibers may absorb paint unevenly. The result rarely looks professional. If you want a painted finish, removal is the better long-term choice.
Will removal damage my drywall?
It depends on the original installation. If the wall was properly primed before installation, removal should leave the drywall intact. If grasscloth was installed on bare, unprimed drywall, expect some surface damage that will need skim coating to repair.
Can I install new wallcovering over old grasscloth backing?
Only if the backing is firmly bonded, smooth, and completely intact. Any loose edges, bubbles or peeling areas must be removed or re-glued first. Prime the backing with wallcovering primer before installing the new layer. This approach avoids wall damage but adds thickness to the wall surface.
Related Guides
Repair Grasscloth
Fix tears, seams and stains.
Wall Preparation
Prep walls for new installation.
Installation Guide
Full 7-step installation process.
Best Adhesive
Choosing the right paste.
DIY vs Professional
When to hire a pro.
Textured Walls
Installing on imperfect surfaces.
Ready for a Fresh Start?
Replacing old grasscloth? We can supply matching or upgraded natural wallcovering for your next installation.
Contact Us